

For a kitchen work aisle, start with at least 42 inches between the island and surrounding counter or appliance fronts for one cook, or 48 inches for multiple cooks. A simple walkway has a different planning baseline, commonly 36 inches.
When choosing an island, compare its depth as well as its length. The depth determines how much of the space between opposing cabinet runs the island occupies, while its length affects the routes around the ends. You can compare kitchen islands after measuring your available space and identifying the clearances your kitchen needs.
Table of Contents
Identify What Happens in the Gap
A work aisle is where someone stands to prepare food, use the sink, load an appliance, or reach cabinets. A walkway mainly carries people past the kitchen. A gap can look like an empty passage on a floor plan while functioning as a work aisle during dinner preparation. Classify it by how the household uses it, not by the label that makes a larger island fit.
The National Kitchen & Bath Association's publicly available Kitchen Planning Guidelines with Access Standards distinguish kitchen planning spaces and provide recommendations for functional layouts. NKBA has also published the fourth edition of its Kitchen & Bath Planning Guidelines, which covers topics including passageways, activity centers, accessibility, and kitchen equipment.
The following figures are commonly used as starting points for planning. Treat them as guidance rather than current local code or a complete accessible-kitchen specification.
Space or activity | Planning starting width | What still needs checking |
Work aisle for one cook | At least 42 inches | Appliances, drawers, handles, and daily tasks |
Work aisle for multiple cooks | At least 48 inches | People working or passing at the same time |
Simple walkway | At least 36 inches | Doorways, traffic, turning, and household needs |
If children pass through while someone cooks, or two adults regularly prepare meals together, test that real use. A route beside the refrigerator can be busy even when only one person cooks. Seating also changes the task: the space behind occupied stools must accommodate the diners and any passing traffic, so it needs its own assessment.
Measure From the Finished Edges
Measure the Actual Clear Span
Measure the clear distance between the relevant finished counter fronts, tall cabinets, or appliances. Do not measure from the wall behind a cabinet, from a recessed toe kick, or between cabinet boxes while ignoring countertop overhangs. For a conservative floor test, mark projecting handles and other obstructions as well, then check the actual space available to people.
Find the Narrowest Point
Measure at several points along the island. Walls and cabinets may not be perfectly parallel, and a refrigerator, oven handle, or corner can create a narrower section than the middle of the aisle. Record the tightest point. A generous measurement at one end does not resolve a pinch point beside an appliance.
Use the island's full top footprint, not just its storage base. A seating overhang can extend beyond the cabinet body, and a rounded top may reach farther at some points than a simple rectangle suggests. Confirm the orientation of width and depth on the dimension drawing before transferring the measurements to the floor.
Compare Island Depth Before Choosing Length
Once you know the available span, compare island dimensions against the clearances you want to preserve. A shorter island may improve access around its ends, but it will not automatically create more space between the island and the cabinets along its sides. For that, the relevant dimension is its depth.
The three kitchen islands below illustrate different footprint trade-offs. Their listed dimensions provide a starting point for comparison, not a guarantee that a particular model will fit every kitchen.
A 72-Inch Japandi Island With a 30-Inch Depth
The 72-inch Japandi kitchen island with storage and LED lighting is listed at approximately 72 inches wide, 30 inches deep, and 35 inches high.
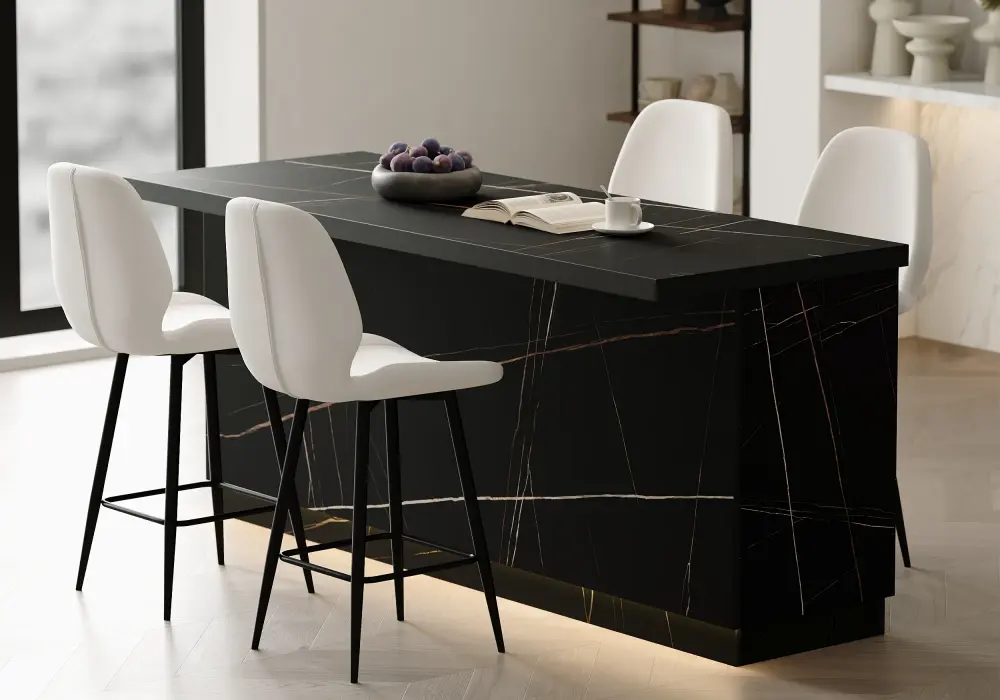
When this footprint may make sense: If you want a relatively long island but need to limit how much space it occupies between opposing cabinet runs, its listed 30-inch depth provides a useful starting point. With the 72-inch length running parallel to the cabinet fronts, that depth is the primary dimension to use in a simplified side-clearance calculation.
What to check before choosing it: The 72-inch length still needs to work with the routes around both ends. Check the full countertop footprint, any seating overhang, appliance doors, and the narrowest points along the aisle. A relatively shallow island does not automatically make the complete layout workable.
A 50-Inch Island With a Natural-and-Gray Finish
The 50-inch natural-and-gray kitchen island with storage is listed at about 50 inches wide, 32 inches deep, and 36 inches high.
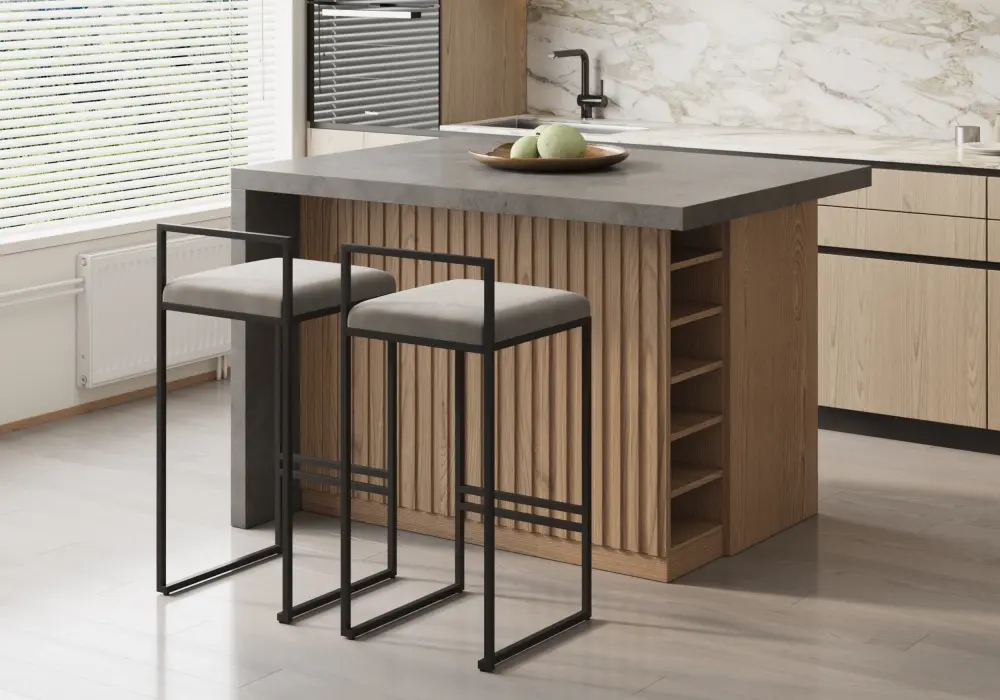
When this footprint may make sense: A shorter island may be worth considering when you need to preserve routes around its ends or have limited uninterrupted floor space along the cabinet run. Its 50-inch length offers a different layout option from the two 72-inch models.
What to check before choosing it: Its listed depth is 32 inches, which is 2 inches greater than the 30-inch-deep Japandi option above. If both islands are centered in the same opposing-counter span, this model would leave slightly less clearance on each long side. Choosing a shorter island does not, by itself, solve a side-clearance problem.
A 72-Inch Walnut Island With a 32-Inch Depth
The 72-inch walnut kitchen island with storage is listed at approximately 72 inches wide, 32 inches deep, and 35 inches high.
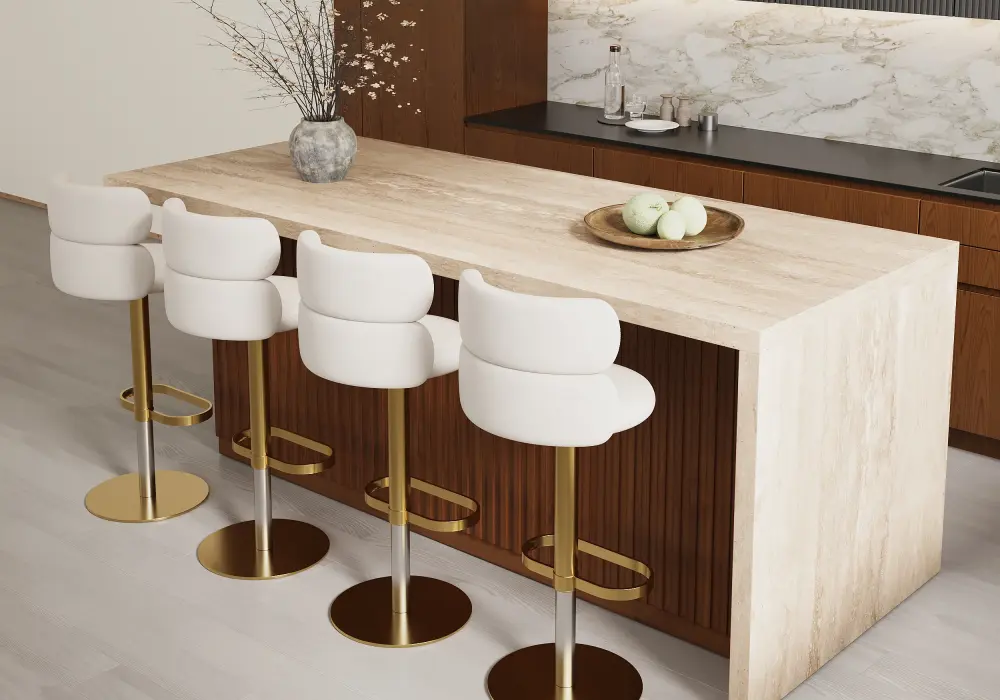
When this footprint may make sense: If you prefer the longer 72-inch format and have enough room for a 32-inch-deep island, this option is worth comparing with the shallower model. The listed length is the same as the Japandi island, making depth a useful point of distinction.
What to check before choosing it: Compared with the 30-inch-deep island, the additional 2 inches of depth reduce the combined space available for the two side aisles by 2 inches. If the span is tight, that difference may affect whether the planned work areas have enough room. Confirm the selected variant and full countertop projection before deciding.
Calculate the Space Available for the Island
If the island sits between two opposing cabinet runs, measure the clear span between their finished fronts. Subtract the planned aisle on each side; the remainder is the maximum island depth for that simplified arrangement. You must still check appliance openings, seating, and the paths around the ends.
Use a Simple Clearance Calculation
For example, suppose the clear counter-to-counter span is 120 inches. Two 42-inch aisles use 84 inches, leaving 36 inches for the island. A 32-inch-deep island would leave 88 inches for the two aisles, or 44 inches on each side if centered. These are hypothetical dimensions to explain the calculation, not a fit approval for an unmeasured kitchen.
The same example shows how the three listed product footprints compare if the islands are centered, oriented with their long sides parallel to the cabinet runs, and measured without any additional overhang or obstruction adjustments.
Island depth | Calculation | Clearance on each side |
30-inch-deep island | (120 − 30) ÷ 2 | 45 inches |
32-inch-deep island | (120 − 32) ÷ 2 | 44 inches |
Under these simplified assumptions, the 30-inch-deep Japandi island would leave 45 inches on each side, while either 32-inch-deep island would leave 44 inches on each side. The shorter 50-inch island would not create more side clearance than the 72-inch walnut island because their listed depths are the same.
These calculations are useful for comparing dimensions, but they do not account for every part of a real kitchen. Countertop projections, handles, uneven walls, appliance openings, stools, and the paths around the ends can all change the final layout.
Run the calculation again if the household needs wider work areas. Two 48-inch aisles within the same 120-inch span would leave only 24 inches for the island. None of the three listed depths would fit that simplified arrangement while preserving both 48-inch aisles. Reducing the island's length would not resolve this depth conflict between the opposing runs.
For a more accurate decision, measure your own space and compare the result with the complete product dimensions. If your layout needs wider work aisles than the available span permits, reconsider the island depth or placement rather than relying on the product's length alone.
For an island beside a wall on one side and cabinets on the other, identify the activity on each side before assigning the spaces. One may be a work aisle, while the other is a route to a door or seating. Do not simply split the remaining space equally without considering how people and doors will use it.
Test Appliances and Storage in the Open Position
Check Appliance Doors and Drawers
Mark the oven, dishwasher, refrigerator, and cabinet-door swings on the plan. Check whether someone can use an appliance without being trapped between its open door and the island. Also check where that person stands and how another household member would pass. The closed-door aisle measurement is only one part of the layout.
Include drawers and doors on the island itself. Opposing storage can create a conflict when both sides are open, even if each unit works alone. Pay particular attention to corner drawers, refrigerator handles, and the route between the sink and dishwasher. Avoid placing the island where normal loading or unloading blocks the only path through the room.
Follow each appliance's installation instructions for opening, service, and ventilation requirements. A general kitchen-spacing article cannot override those instructions. If plumbing, electrical work, or a built-in appliance is involved, have the relevant professionals review the installation and any applicable requirements before work begins.
Add Seating and Household Needs to the Plan
Stools occupy more space when people are seated than when they are tucked beneath the top. Place actual stools at the proposed island edge and ask someone to sit down. Check the path behind them, the room needed to get in and out, and whether drawers or appliances remain accessible.
If a wheelchair, walker, or other mobility aid is used, assess turning, approach, reach, knee space, and appliance access together. A single aisle width does not establish accessibility. Work with a designer familiar with the user's needs and the requirements that apply to the project. The most useful layout should suit the people who use the kitchen throughout the day.
Think about the island's purpose as well. If its main job is storage and serving, a smaller footprint may meet the need while keeping the kitchen easier to navigate. A larger island offers more surface, but that benefit diminishes if people repeatedly step aside, close doors, or move stools to cross the room.
Complete a Full-Size Floor Test
Mark the Entire Footprint
Tape the island's complete outline on the floor, including the overhang. Mark the stools and open appliance doors with a different tape line. Walk through breakfast, cooking, dishwasher loading, and bringing groceries to the refrigerator. Repeat the test with the number of people who normally use the kitchen together.
Recheck the Layout Before Ordering
Leave the outline in place long enough to notice everyday conflicts. Check the ends as carefully as the long sides, especially near a doorway or pantry. If the arrangement feels tight, try a different orientation or a smaller depth before finalizing the furniture. Keep the measured plan for delivery and assembly so the finished island is positioned where you tested it.
Frequently Asked Questions
Is 36 Inches Enough Between an Island and Cabinets?
It may be a starting point for a simple walkway, but it is not the work-aisle recommendation discussed above. Decide whether the space serves cooking, appliance use, seating, or passing traffic before choosing its width.
Where Do I Measure the Island Clearance?
Measure between the relevant finished counter, cabinet, and appliance fronts. Include countertop projections and check handles, open doors, and the narrowest points separately.
Does a Smaller Island Always Give Me Wider Aisles?
Only when the dimension you reduce is the one occupying that aisle. A shorter island can improve end access while leaving the same side clearance if its depth stays unchanged.
Should I Center the Island Between the Cabinets?
Only if equal aisles suit the activities on both sides. Appliance use, seating, doors, and the main traffic route may justify an offset position after all clearances are checked.
Can I Choose an Island From the Room Width Alone?
No. Account for cabinet and counter depths, the island's full top footprint, operating appliances, stools, and routes around the ends. Use a floor mockup and the product's dimension diagram together.