

A coffee table tray works best when it reads as a single intentional object rather than a pile of things that landed on it. The tray's job is to gather the small, loose items a living room generates — remotes, coasters, a candle, a book — and give them one place to live. Style it by choosing a tray that fits the surface, grouping a small odd number of objects on it, and creating height variation so the arrangement has a front, a middle, and a back.
Start by browsing the coffee tables available in round, rectangular, lift-top, and nesting styles, because the table underneath determines everything about the tray that works on it.
Table of Contents
Rule 1: Match the Tray to the Table, Not the Other Way Around
The most common styling mistake is a tray that floats on a table with too much exposed surface around it, or one that is so large that it covers the table and turns the whole thing into a tray table. Neither reads well. For more on the styling fundamentals, see our guide to how to style a coffee table.
Use the tray's footprint as a proportion of the tabletop. A good working range is roughly a quarter to a third of the visible tabletop area. On a small round table, a tray that takes up about half the surface works because the round shape means every edge curves away. On a long rectangular table, the proportion should be smaller — a narrow tray placed off-centre or a pair of trays at either end reads better than one oversized tray down the middle.
Before buying a tray, measure the table's usable top and then measure the tray. Most home décor trays are sold in a 12–16 inch range, and most coffee tables fall between 32 and 48 inches long. A 16-inch tray on a 48-inch rectangular table will look lost. A 16-inch tray centred on a 32-inch round table will look intentional.
The tables you already own or are considering also determine whether a tray is the right tool at all. A table with a large flat top and no built-in surface features is a good tray candidate. A table with a lift-top mechanism is a tray candidate only in the closed position, since the raised surface changes the height everything sits at.
Rule 2: Pick a Tray Shape That Echoes the Table
Shape is the fastest way to make a tray look chosen rather than accidental. A round tray on a round table is calm and unified; the same tray on a sharply rectangular table creates a deliberate contrast, which also works but needs stronger styling elsewhere.
Three pairings that reliably look good:
- Round tray on a round table. The softest option. It softens the geometry of a table that already has strong circular form.
- Rectangular tray on a rectangular table. The most architectural option. It lines up with the table's edges and reinforces the geometry.
- Round tray on a rectangular table. The most relaxed option, and the one that softens a table with hard lines.
What to avoid is a very thin, sharply angular tray on a round table, and a heavy, ornate tray on a table with fine lines. The weight and detail of the tray should not overpower the furniture beneath it.
Rule 3: Group an Odd Number of Objects
Interior designers overwhelmingly use odd numbers of objects in a group, and the reason is structural rather than superstitious. A group of three has a natural visual center and two supporting elements, which the eye reads as a complete composition. A group of four tends to split into two pairs, which the eye reads as two smaller groupings. A group of two reads as a pair and often looks sparse on a large tray.
This is the rule that most visibly separates a styled tray from a cluttered one. Odd numbers — three, five, seven — create a rhythm that holds together.
A reliable three-object formula works in almost any style:
- One taller object. A pillar candle, a small vase with stems, or a carafe.
- One medium object. A stack of two or three books laid flat, a small bowl, or a lidded box.
- One shorter, flatter object. A dish of matches, a small coaster set, a folded pair of reading glasses.
The visual result is a stepped arrangement: tall, medium, low. If you add a fourth object, make it a second item in one of the existing height categories — a second small dish, not a fourth new shape.
Rule 4: Create Height Variation Within the Tray
Flat styling looks unfinished. The single biggest difference between a tray that looks designed and one that looks restocked is that the objects on it sit at different heights.
Three ways to build height without buying matching items:
- Stack books flat. Two or three hardcover books laid flat make a stable riser for a small object. Lay them spine-out so the covers face the viewer and the tray reads as intentional.
- Nest a smaller tray inside a larger one. A small brass or ceramic tray inside a wood or rattan tray immediately adds a visible step in height and adds texture contrast at the same time.
- Invert a vessel. A small bowl placed upside down next to a matching upright bowl creates height difference from a single set of pieces.
Candles are the most common height tool for a reason, but be selective. Two or three different heights of candle look better than a row of identical ones. If you use a pillar candle, place it on a low dish so it does not read as a single object stuck in the middle of the tray.
Rule 5: Use Odd, Imperfect Textures — Not Matching Sets
Coordinating every element is the fastest route to a tray that looks like a hotel lobby. Mix one warm material against one cool one and you get depth without clutter.
Texture pairings that work well on coffee tables:
- Natural fiber against metal. A woven or rope placemat under a brass or matte black tray.
- Wood against stone. A wood tray holding a marble or ceramic object.
- Velvet or fabric against glass. A soft cloth catching the light against a hard reflective surface.
Keep the color palette to two neutrals plus one accent. If your tray is warm-toned wood, use a ceramic or stone object on it and let one small colored item — a flower, a book spine, a candle — carry the accent. This is what keeps a tray from looking like a miniature still life that has been over-worked.
Rule 6: Keep the Function and the Decoration Separate
A coffee table tray serves two purposes that are in constant tension. The functional side holds remotes, coasters, charging cables, and a small tray of snacks. The decorative side holds the candle, the book, the bowl.
If you try to do both in one arrangement, the decorative objects get displaced every time someone needs the remote, and the functional objects end up scattered because they have no defined place.
The better approach is to divide the tray. Use a larger tray with a smaller dish or holder on one side for the items that move, and reserve the other two-thirds for the objects that stay. On a small single tray, use a small lidded box or a shallow dish as a dedicated catch-all for remotes, so the decorative objects can stay in position.
A second useful habit: keep a small stack of coasters on the tray permanently. It is a functional object that also adds a subtle repeated shape, so it earns its place visually.
Rule 7: Scale the Objects to the Tray
Objects that are too small disappear. Objects that are too large crowd out everything else and turn the tray into a plinth for a single item.
A practical test: after arranging the tray, look at it from standing height across the room. You should be able to identify at least three distinct objects. If everything blends into one mass, either the objects are too similar in scale or there are too many of them.
The same test reveals the opposite problem. If a single object spans more than about half the tray's width, it is dominating and the tray is no longer functioning as a grouping surface.
Match the Tray Style to the Table You Own
The right tray depends on the table's shape, size, and finish, and it also depends on how much storage the table already provides.
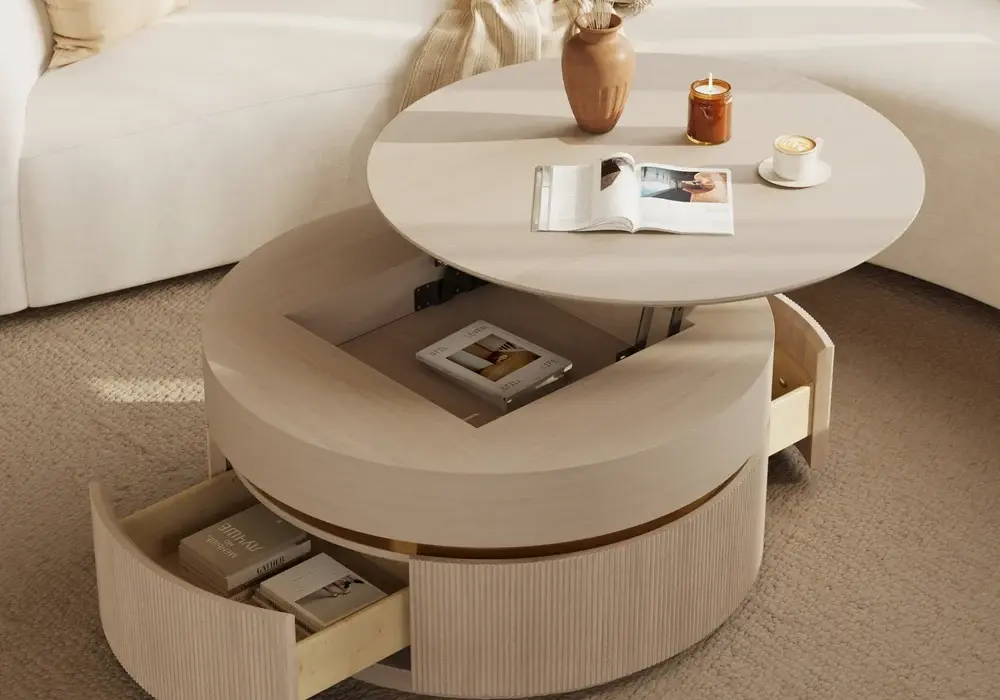
The 32-inch Fluted Lift-Top Round Coffee Table is a 32-inch round table in a whitewash finish with ash wood veneer detailing, and it ships with two drawers plus a concealed storage compartment under the lift top. Because the closed top is a clean round surface with no visual clutter, a round tray in a contrasting material works well here. The round tray echoes the table's curve while the contrast material stops the arrangement from disappearing into the whitewash. Note that the fluted base and the tray will both be pale, so choose a tray in a darker or more saturated tone if you want the grouping to read clearly from across the room.
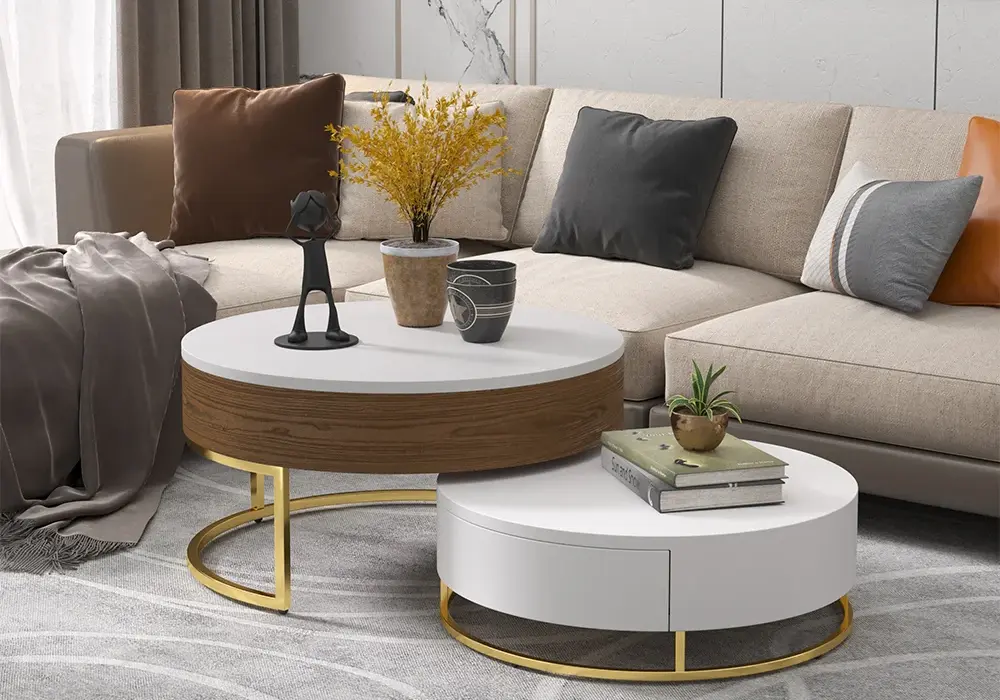
If you prefer two separate surfaces, the Nesnesis 2-Piece Lift-Top Nesting Coffee Table Set is a round lift-top nesting pair in white and walnut with rotatable drawers. The nesting design gives you two distinct tops, which is genuinely useful for tray styling: put the styled tray on the larger table and leave the smaller one clear for a drink, a book, or a bowl of fruit. This is one of the easiest ways to create the layered, collected look that makes a coffee table feel finished — and it costs nothing beyond buying one tray instead of two.
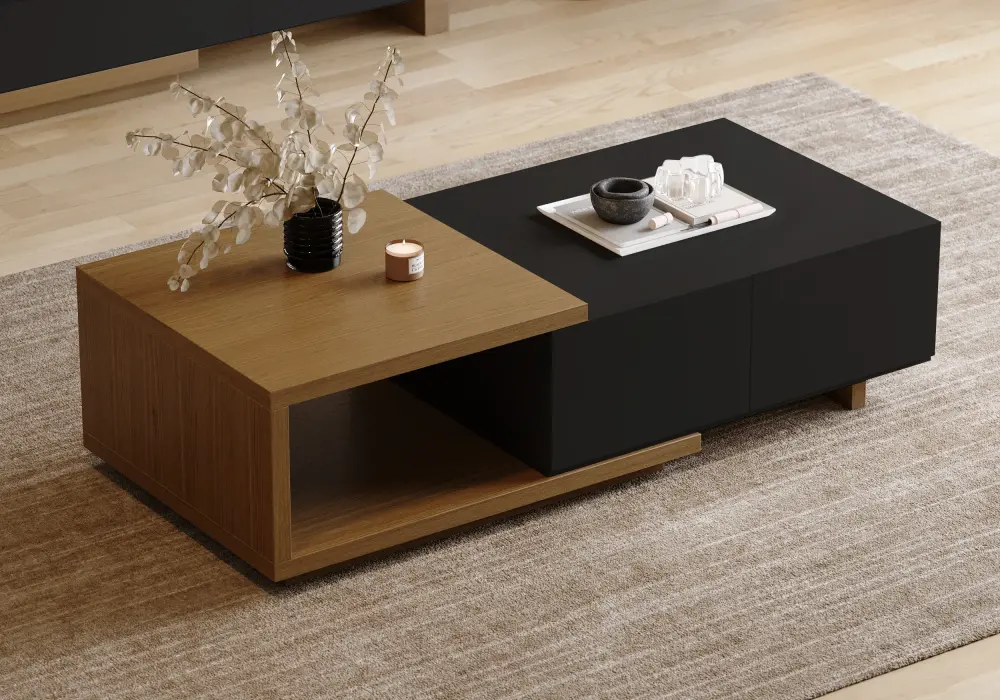
For a table that changes shape as the room changes, the Quoint 47–69 Inch Extendable Hidden Storage Coffee Table retracts to 47 inches and extends to 69 inches, with a walnut finish, two drawers, and a hidden storage shelf. This is the tray's best friend for a different reason: because the table's footprint changes, you can move the tray from the extended end to the retracted end and the arrangement stays proportionate instead of looking stranded. Extend the table for meals and keep the tray centred on the extended section; retract it for daily use and slide the tray back toward the closed end. With a walnut finish and a rectangular shape, a rectangular tray in a light material such as pale ceramic, light oak, or rattan gives the clearest contrast.
Common Tray Styling Mistakes
Most badly styled trays fail for one of a small number of reasons.
The tray is too large. It covers the table and removes the furniture from view, which defeats the purpose of having a coffee table at all.
Everything is the same height. A flat arrangement reads as an afterthought. Fix this by removing one object and placing it on top of another.
Too many unrelated objects. Three groups of five each is still fifteen objects. Break the contents into distinct clusters with clear space between them.
The palette is all one color. A monochrome tray is harder to style than a mixed one because nothing catches the eye. Add one contrasting element.
The tray is never cleared. A tray accumulates. Remove anything that has no purpose at least weekly — this single habit does more for a coffee table than any arrangement change.
Everything is pushed to one side. Center the grouping on the tray, or offset it deliberately by roughly one third so it reads as a designed position rather than a mistake.
Frequently Asked Questions
What size coffee table tray should I buy?
Choose a tray that covers roughly a quarter to a third of your tabletop, or about half the surface of a small round table. Most trays sold for this purpose are 12–16 inches, which suits tables in the 32–40 inch range. Measure the table's usable top first, then measure the tray, and pick the smaller proportion if you are unsure.
What material should a coffee table tray be?
Choose the tray material to contrast with the table's finish. Woven or rope trays soften hard wood and stone. Metal trays add polish to wood and painted surfaces. Wood trays suit fabric and glass tables. The most useful quality is a flat, stable base with raised edges, so objects do not slide and nothing catches on the rim.
Should the tray match the coffee table's color?
Not necessarily. Matching creates a calm, unified look but can disappear into the table. A contrasting tray in a different material — metal on wood, wood on stone, rattan on lacquer — separates the arrangement from the surface and makes the grouping easier to read. Either approach works; contrast simply looks more deliberate.
How many objects should I put on a coffee table tray?
Three to five is the usual range. An odd number groups more naturally than an even one because the eye reads it as a composition rather than two pairs. Keep one object noticeably taller than the others and one noticeably shorter, and leave clear space so the tray itself is still visible.
What should I put on a coffee table tray?
The most useful combination is a decorative group of one tall object, one medium object, and one small object, plus a small dish or lidded box to hold the remotes and other items that move. Keep the decorative objects in a fixed position and let the functional items live in their own container, so the arrangement survives regular use.
Does a coffee table tray make a table look better or worse?
It makes a table look better when it gathers loose objects into one deliberate grouping and adds height, texture, and contrast. It makes a table look worse when it is oversized, when it holds too many unrelated things, or when it is used to hide clutter rather than organize it. A tray is a display surface for a few chosen items, not a drawer.